
This easy homemade pie crust recipe has ultra-flaky layers and the most delicious buttery flavor. It’s a classic flaky pie crust that’s super easy to make and goes wonderfully with all your favorite pie filling recipes.
Once you’ve prepared your crust, use it to make everything from banana cream pie to homemade apple pie and pumpkin pie for Thanksgiving! I also have a gluten-free pie crust if you need a gluten-free version.

Is it just me, or is a tender, flaky pie crust completely irresistible? There is something about a bite of homemade pie crust paired with a delectable apple pie filling, or any filling, that turns an occasion into a special one. It took me years to warm up to making my pie crusts from scratch. But, while frozen pie crusts are convenient, they just never compare to homemade. The best part of this simple from-scratch recipe is the buttery flavor and flaky texture of the crust. It doesn’t get hard or dry, no matter what filling you add to it! I’ll show you how to make a perfect pie crust using your blender, and how to blind bake it afterward for desserts like pumpkin pie.
Why This Flaky Homemade Pie Crust Recipe Works
- Rich and structured. I pulled together a few of my favorite pie crust components to make it: vinegar and an egg. The egg helps bind the crust together while the vinegar keeps it supple. This makes the dough very easy to work with.
- Easy to handle. No more cracking crusts that fall apart when you’re trying to transfer them to the pie plate. Phew!
- Make it in the blender. Using a blender or food processor, the pie dough comes together in minutes. This is by far the easiest way to make a buttery, flaky pie crust that holds up to any filling.
- Make-ahead-friendly. You can easily make your homemade pie crust in advance and store it in the fridge or freezer.
Ingredient Notes
In addition to the ingredients below, you’ll need ice-cold water to form the ultimate dough for your pie crust. As you’ll see, the recurring theme with pie crust-making is keeping things cold, so that the crust becomes flaky while it bakes. Scroll down to the recipe card below the post for the full, printable recipe measurements and step-by-step instructions.
- Unsalted Butter – Make sure the butter is cold from the fridge.
- All-Purpose Flour – Use a kitchen scale or the spoon and level method rather than scooping your measuring cup directly into the flour. Accurate measuring is super important! I go into this in-depth in my tutorial on how to measure flour.
- Egg – To bind everything together.
- Distilled White Vinegar – Vinegar helps protect the dough against overworking. If you don’t have white vinegar, you can use water instead if preferred.

Shortening vs. Butter in Pie Crust
Some bakers swear by shortening as the secret to an exceptionally tender and flaky pie crust. After testing this recipe with both butter and shortening, I have to say, you simply can’t beat the flavor that comes with an all-butter crust. However, if you’d prefer to bake with shortening, you can use it as a 1:1 substitute for butter in pie crust recipes. Since shortening lacks flavor, consider adding a little extra salt.
How to Make Pie Crust From Scratch
This approachable homemade pie crust recipe isn’t hard to make, and I think you’ll taste the difference compared to store-bought. The pie dough comes together in minutes in the food processor, and it’s easy to handle. That was my goal when I created this recipe, since I wanted to make a pie crust that anyone could master in just a few steps. Here’s how to make it:
- Prepare the butter. Start by cutting the butter into 1/2-inch cubes. It should be cold from the fridge.
- Combine the butter and flour. Next, combine the cold, cubed butter with flour and salt in a food processor. Pulse several times until the mixture is crumbly, but still has large chunks of butter.


- Add the egg, vinegar, and ice-cold water. Now, add the egg, vinegar, and 2 teaspoons of ice water to the dough. Pulse again until the dough starts to come together. If needed, add additional water, 1 teaspoon at a time.


- Shape and chill the pie dough. Turn the blended dough out onto a clean work surface. Then, press it into a ball, and flatten it into a disc about 5 inches wide. Afterward, wrap the dough in plastic wrap and refrigerate it for at least 60 minutes.


- Roll out the pie crust. When you’re ready, take the dough out of the fridge and roll it into a flat circle on a lightly floured surface. Roll from the center to the edges, rotating occasionally. You’ll want to roll the crust out so it’s about 11 inches in diameter, leaving you at least 1 inch on each side of the pie plate.
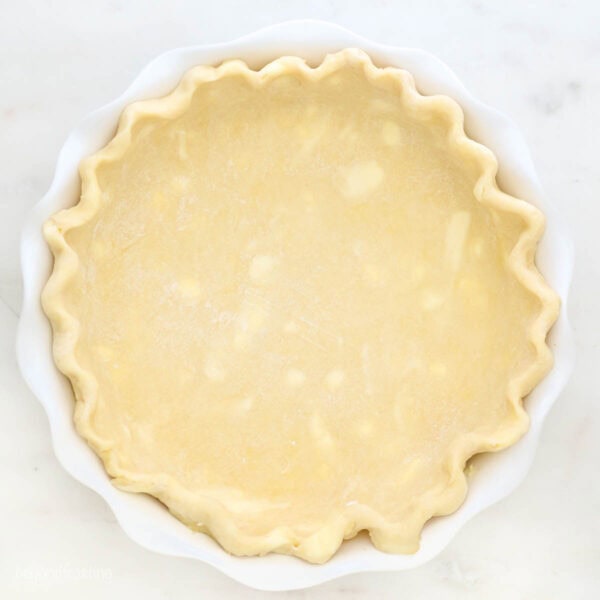
- Refrigerate until it’s time to fill. Lastly, transfer the rolled-out dough to a 9-inch pie plate. Fold under the excess dough, then crimp the edges. Then, refrigerate the pie crust while you prepare your pie filling.


When and How to Blind Bake a Pie Crust
Some pies require pre-baking of the crust, also known as blind baking or par-baking. This involves baking the empty prepared pie crust before you add the filling. This is most common in no-bake recipes and desserts with a pudding or custard filling, like coconut cream pie or French silk pie. You can also do a partial blind-bake for recipes where the filling will still be baked afterward, like pumpkin pie. In these cases, blind baking the crust creates a sturdy base and prevents a soggy bottom.
Here’s a summary for blind baking your homemade pie crust. If needed, I have a full tutorial on how to blind bake a pie crust that goes into the steps in detail. Refer to the specific recipe directions to know if you should blind-bake your crust before you fill it.
- Prepare for baking. Preheat the oven to 375°F. Leave your chilled pie crust in the fridge until you’re ready to fill it.
- Weigh down the crust. Adding pie weights keeps the crust from puffing up too much in the oven. Place a sheet or two of parchment paper over the chilled crust. Then, fill the crust about 3/4 of the way full with a combination of pie weights and dry rice or beans. Push the beans/pie weights to the edges of the pie plate. This helps the edges of the crust hold their shape.
- Blind-bake. Now, bake the crust in the 375ºF oven for about 15 minutes, or until the edges begin turning golden brown. Remove it from the oven, and remove the pie weights and parchment paper.
- Dock the crust. Use a toothpick or a fork to poke holes into the bottom of the crust. This is a technique called “docking” a pie crust, and it prevents bubbles from forming.
- Bake again. Return the crust to the oven without the pie weights and bake for another 7-8 minutes, or until the bottom begins to brown as well.


Tips for the Perfect Pie Crust
- Use very cold butter. Don’t remove the butter from the refrigerator when you’re gathering the ingredients for your pie crust. Leave it in the fridge until you’re ready to cut it up so it stays as cold as possible. Cold chunks of butter in the dough make for extra flaky pie crust.
- Roll the dough out over a silicone mat. I like to put a silicone mat down underneath my parchment paper to keep it in place while I’m rolling out the dough. Be sure to lightly flour the parchment paper and roll the dough from the center to the edge, rotating it occasionally. This prevents sticking.
- Don’t trim the edges too much. You want at least 1 inch of extra crust hanging over the edges of the pie plate to fold underneath and crimp.
- Chill the crust before baking. It’s important that your dough is cold when you place it in the oven after it’s been rolled out in the pie dish. I recommend a 30-60 minute chill time. While the crust is doing it’s final chill, you can prepare the filling and preheat the oven.
- Blind-bake over a rimmed baking sheet. I recommend placing a rimmed baking sheet on the bottom rack of the oven when you’re blind baking your pie crust. If there are large pockets of butter on the edges of the crust, they can sometimes leak over the sides.
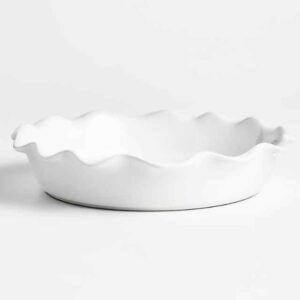
This ruffled-edge 9-inch pie plate is my favorite dish. It’s simple yet elegant with a fluted edge.
These handy pie weights can be used when blind baking a crust to help the pie maintain it’s shape while par-baking. These are natural food-safe ceramic stoneware and heat safe up to 480 F.

Recipes Using a Homemade Pie Crust
Now that you’ve got your easy pie crust taken care of, let’s move on to the filling! The recipes below are some of my favorites that complement this classic, buttery crust.
- The classics. Try out this flaky pie crust in classic holiday desserts like homemade apple pie, pumpkin pie, and pecan pie for Thanksgiving or Christmas.
- Fruit fillings. Fill this pie crust with peach pie, cherry pie, or berry pie filling. You can easily adapt the filling depending on which fruits are in season.
- Crumble pie. If you can’t decide between apple pie and apple crumble, my apple crumble pie is the best of both worlds.
- Custard and pudding pie. This old-fashioned chocolate pie is super rich, creamy, and decadent, as is this German chocolate pie. This crust also goes great with my favorite coconut custard pie.
- Mini pies and hand pies. You can use this homemade crust as an alternative to store-bought pastry crust in recipes for apple hand pies or mini blueberry pies.
Make a Lattice Crust
For a special touch, follow my tutorial on how to lattice a pie crust to turn this simple pie crust recipe into a gorgeous, woven top crust for your favorite pie recipes. I especially love to use this technique when baking fruit pies, where the colorful filling peaks through.
Make-Ahead, Storage, and Freezing
- Make the pie dough ahead. If desired, you can prepare this crust up to 3 days in advance. Simply keep the plastic-wrapped dough in the fridge instead of removing it and rolling it out after 60 minutes. If you want to make it more than 3 days ahead of time, you’ll have to store it in the freezer according to the instructions below.
- Freeze the unbaked pie crust. To freeze your pie crust, wrap it in two layers of plastic wrap after flattening it into a disc. Store it in the freezer for up to one month. You’ll have to thaw it out in the fridge before proceeding with the recipe.
More Easy Pie Crust Recipes to Try
Easy Pie Crust
- Prep Time: 3 hours
- Cook Time: 20 minutes
- Total Time: 3 hours 20 minutes
- Yield: 8
- Category: Dessert
- Method: Oven
- Cuisine: American
Description
This soft and tender Homemade Pie Crust has ultra flaky layers and the most delicious buttery flavor. It’s super easy to make and goes wonderfully with all your favorite filling recipes!
Ingredients
- ½ cup (113g) unsalted butter, cold
- 1 ½ cup (210g) all-purpose flour
- ½ teaspoon salt
- 1 large egg
- 1 tablespoon (15ml) distilled white vinegar
- 2 teaspoons ice cold water (additional as needed)
Instructions
- Cut the cold butter into 1/2-inch thick cubes. It should be fresh from the fridge.
- Combine the flour, salt and butter in a food processor. Pulse several times until the mixture is crumbly, but still has large chunks of butter.
- Add the egg, vinegar and 2 teaspoons of ice cold water. Pulse until the dough begins to hold together. If needed, add additional water 1 teaspoon at a time.
- Turn the dough out onto the counter. Press it into a ball, then flatten it into a disc about 5 inches wide. Wrap it in plastic wrap and refrigerate it for a minimum of 60 minutes.
- Roll the dough onto a lightly floured surface, rolling from the center to the edges and rotating occasionally. Roll it out so it’s about 11” in diameter, leaving you at least 1 inch on each side of the pie plate.
- Place the dough into a 9-inch pie plate and fold under the excess edges, then crimp the edges. Refrigerate the dough while you prepare your pie filling.
Notes
- Makes 1 9-inch pie crust
- This crust is enough to fill a deep-dish pie plate


I like this recipe! Thank you for sharing.
You’re welcome Daphne!
Do you have a link to your favorite silicone mat?
Yes! I use Silpats mostly, not a specific pie mat per say https://amzn.to/36zvjJ7
Can you make these ahead and freeze them? How long can you keep them in the freezer?
This is in the blog post- To freeze your pie crust, wrap it in two layers of plastic wrap after flattening it into a disc. Store it in the freezer for up to one month.
Can these be frozen prior to baking?
Yes, most certainly. There is a section in the blog post “How to freeze”
For blind baking, after the initial 15 minutes of baking, I’m guessing you remove the paper and weights for poking holes. For the second baking is it without the parchment/weights? It really does not specify that important detail.
Hi Pam, I have an entirely separate post dedicated how to how to blind bake a pie crust. You can find the tutorial here. I have also updated the text to reflect additional details as you mentioned.
Does this crust have to be pre baked for apple pie and pecan pie
It depends on what the recipe states to do. Not all recipes are created the same
Greetings,
In lieu of food processor I use a pastry cutter to work in the butter, then add the water and form with my hands. Will that make a difference?
My grandmother taught me how to do that for biscuits recipes (neither of us had a processor) so I do it with pie crusts also.
Hi Cheryl, yes you can absolutely do this. Make sure you chill the pie crust before placing it in the oven to help prevent it from shrinking.
If one doesn’t have a food processor? Can you please advise.
You can mix it by hand and use a pastry cutter if you have it. Otherwise use two forks.
Those who haven’t tried the recipe should try it now.
Do you recommend doubling the recipe when making top/bottom crust for a pie?
Yes! This is only a single crust
Does this crust have to be baked before filling for a pumpkin pie ???
Hi Jane, yes it does. My pumpkin pie recipe calls for it to be partially baked.
Can this crust be used for top and bottom crust? Thank You. Gail
Yep!
Why when I printed this did an ad cover the last part of the note?
You should not be seeing ADs on your print out, can you send me a photo? julianne at beyondfrosting dot com
You can use vodka for the vinegar
Can this be used to make a quiche?
It sure can! I have a quiche recipe coming up next month that uses this crust!