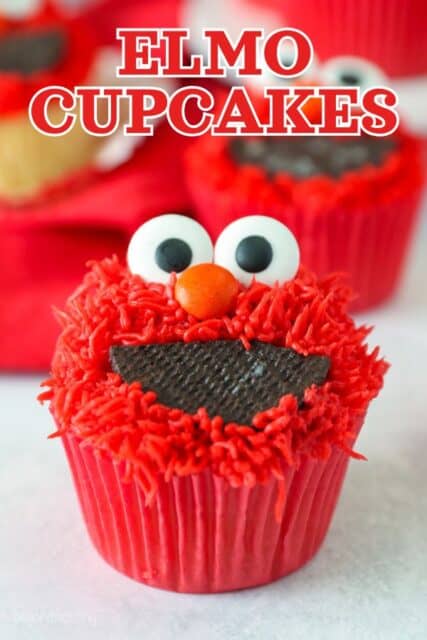
These Elmo cupcakes are super cute and so fun to decorate. This easy tutorial turns a batch of fluffy cupcakes into bright, hairy red monsters using my favorite buttercream and an easy piping technique. Kids love them!
Pair these Elmo cupcakes with my Cookie Monster cupcakes or Cookie Monster cookies for a Sesame Street birthday party.

Easy Elmo Cupcakes Tutorial
Ever since I made a Cookie Monster cake for my son’s first birthday, I’ve had a soft spot for Sesame Street-themed desserts. These Elmo cupcakes are the latest cupcake decorating tutorial I’ve put together.
I had so much fun making these with my favorite vanilla cupcakes, and all it took was a batch of red frosting, some Oreos, and a few easy techniques to turn them into the classic TV show character! Any little Elmo fans in your life are sure to fall in love!
Elmo Cupcakes are Easy to Decorate
- Simple technique. My goal is always to make cake and cupcake decorating as approachable as possible. This tutorial doesn’t require any professional frosting techniques. It’s very beginner-friendly, and a great way to get the hang of using a piping bag with tips.
- Save time. There’s a couple shortcuts with decorating including using Oreo for the mouth and M&Ms for the eyes.
- Customizable. I use vanilla cupcakes, but you can choose any cupcake recipe for the base. If you’re pressed for time, you could even use store-bought cupcakes! Simply scrape off any existing frosting and follow the step-by-step below.

A Few Things You’ll Need
These are some notes on what you’ll need to make these adorable Elmo cupcakes from scratch.
I also found these grease-free cupcake liners in the perfect red color from Shop Sweet Treats. They hold their color when baking, which is always a plus!
Scroll down to the recipe card after the post for the full printable recipe with ingredients, amounts, and directions.
- Cupcakes – You can follow the recipe for my vanilla cupcakes included in this tutorial (see the recipe card for details), or any of my easy homemade cupcakes recipes from the site.
- Frosting – I use my favorite classic buttercream frosting made from COLD butter, powdered sugar, vanilla, and heavy cream. It’s thick, stable, and ideal for decorating.
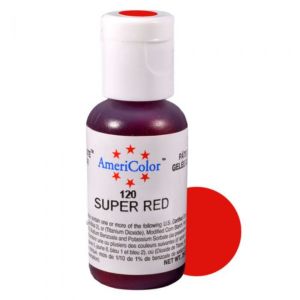
- Red Gel Colors – Concentrated gel colors, like the kind from AmeriColor or Chef Master, offer the most vibrant colors without thinning out the frosting. I use the AmeriColor Super Red Gel Coloring for this tutorial.
- Candy Eyes – I buy these large candy googly eyes from Amazon.
- Oreo Cookies – With the creme filling removed. You’ll break the cookies in half to create a “half-moon” shape for Elmo’s mouth.
- Orange M&Ms – For the nose. I grabbed 2 regular-sized bags of M&Ms and separated out the orange ones. You can also color about ¼ cup of the frosting orange to use instead.
Instead of Vanilla Cupcakes, Try These


You can use this decorating technique with any cupcake as the base. If you’re looking to decorate a cupcake in a flavor other than vanilla, try these ideas. You can also fill the middle of the cupcakes with something extra, like chocolate ganache or edible cookie dough.
Prepare the Frosting
My frosting recipe starts with cold butter. It takes a bit longer to whip, but fridge-cold butter is key to the most stable, pipeable buttercream consistency. You’ll need to prepare the frosting and then dye it a vibrant, Elmo red:
- Whip the butter. Start by beating cold, cubed butter for 5-7 minutes, until it’s lighter in color. You’ll need to to scrape the bowl down a few times and beat at a high speed.
- Add powdered sugar. Next, beat in powdered sugar 2 cups at a time, alternating with vanilla and heavy cream. Mix well in between.
- Whip again. Now, whip the frosting on medium-high speed for another 3 minutes or so. It should be fluffed and airy.
- Color the frosting. Lastly, use gel colors to dye the frosting red (see below). Slowly beat the frosting for 1-2 minutes, or gently fold the color in using a spatula to get rid of any air bubbles.
Coloring Super Red Frosting
How much to use: I use 1 to 1½ teaspoons of Super Red gel dye to achieve a bright red color in the frosting. If you’d like to deepen the color, I recommend using a mix of Crimson (if you have it) and Super Red.
How to darken the red: Another easy way to darken red frosting is to add a small amount of black. I used a toothpick dipped into black gel color to gradually dye the red frosting slightly darker, so it more closely matched the red cupcake liner. Both the Super Red and black food coloring are part of my favorite AmeriColor 12-pack starter kit.
Achieve a better color: It’s worth noting that the red color darkens the longer it sits. Whenever possible, I recommend preparing the frosting the night before you plan to use it. This way, it’ll darken to its true color over time. In this case, you’ll likely need to freshly whip the frosting the following day, before using it to decorate.
Keep in mind that you can always add color, but can’t take it away! If needed, I have a detailed tutorial on how to color buttercream that you can refer to.
How to Decorate Elmo Cupcakes (Step-by-Step)
Once the cupcakes have cooled completely and your Elmo red frosting is whipped and ready, it’s time to decorate. This tutorial uses a simple technique, but it does require a piping bag and piping tips. If you’re new to frosting and decorating cupcakes, I have helpful tutorials on how to use a piping bag and how to use piping tips that walk you through the basics.
What Piping Tip Should I Use?
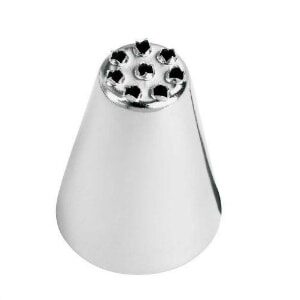
For these Elmo cupcakes, I use a Wilton #233 grass tip to create a hairy effect. While you can buy them online, it’s a pretty common tip and you can often find it cheaper at a craft store or even Walmart.
I also use this tip to make the hair on my Cookie Monster cupcakes and Grinch cupcakes, and to make the grass on my football cupcakes.
- First, cut the Oreos in half. Before you start, scrape out the Oreo creme filling. Then, cut each chocolate cookie in half to create a half-circle for Elmo’s mouth.
- Make a rough frosting base. Next, fill one piping bag ¾ of the way full with red frosting, and snip off the tip about 1/2 inch up from the bottom. Then, roughly pipe a dome of frosting over the top half of a cupcake (as pictured). Gently pull down one side of the frosting dome towards the other edge.
- Place an Oreo cookie over the bottom ⅓ of the cupcake, adhering to the frosting.


- Prepare the piping bags. Now, fit a new piping bag with a coupler and your grass piping tip. I like to fill a couple of separate piping bags with only the frosting, to place inside the bag with the grass tip. This double-bag method makes it super easy to change out the bags of frosting without having to switch the piping tip. The frosting softens in the bag from the heat of your hand, so being able to switch out the bags to super helpful.
- Pipe the red hair. Place the first bag of frosting inside the bag with the grass tip. Using gentle pressure, pipe the frosting onto the cupcake, working around the dome you added earlier. Finally, pipe the frosting around the bottom half of the Oreo to finish,


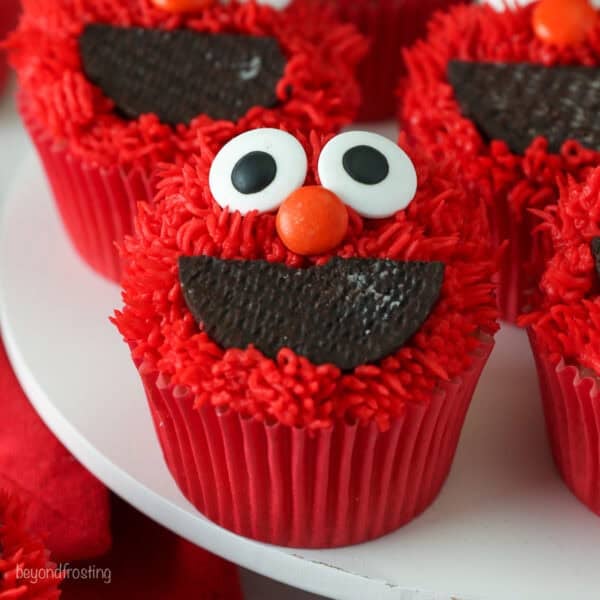
- Add the eyes and nose. Finish the Elmo cupcakes by placing two candy eyes above the mouth, and an orange M&M in the center for the nose. If you are not serving them right away, leave off the eyes and nose until you’re ready as they’ll bleed color into the frosting.

Julianne’s Decorating Notes
- Leave the eyes and nose off until serving. Since moisture tends to make the candy eyeballs expand and bleed, I highly recommend adding them only when you’re ready to serve the cupcakes.
- Adapt the hair length. When you’re piping the red frosting over the cupcake, longer pulls = longer hair, while shorter pulls = shorter hair. You can pull the frosting upwards or downward depending on what’s comfortable.
- Practice makes perfect. If you’re just starting out handling a piping bag, you can do a few test rounds of piping the frosting onto a piece of parchment paper. You can get the hang of applying pressure and pulling the piping tip up and away. Scrape that frosting back into the bowl to use.
- Make the frosting ahead of time. I mentioned it earlier, but the red coloring in the frosting develops and darkens over time. For this reason, consider preparing the frosting the day before you decorate your Elmo cupcakes. If the frosting hardens or set, just rewhip in the mixer for a minute or two.
How to Store
- At room temperature. The frosted Elmo cupcakes can be stored airtight on the counter for up to 3 days. If you live somewhere warm, however, consider keeping the cupcakes in the fridge and serving them at room temperature.
- Freeze. You can freeze the cooled, unfrosted cupcakes for up to 2 months. Thaw at room temperature before frosting and decorating.
- Store leftover frosting. Homemade buttercream is fine to store in an airtight container at room temperature for up to 24 hours. After that, you can refrigerate the frosting for up to 1 week, or freeze it for up to 2 months. Let the frosting come back to room temperature and re-whip it before you use it.
More Birthday Cupcake Ideas
Elmo Cupcakes
- Prep Time: 45 minutes
- Cook Time: 15 minutes
- Total Time: 1 hour
- Yield: 24 cupcakes
- Category: Cupcakes
- Method: Oven
- Cuisine: American
Description
These Elmo cupcakes are fun and easy to decorate using my favorite buttercream and an easy piping technique. They’re perfect for a Sesame Street birthday party!
Ingredients
For the Cupcakes
- 2 cups (380g) granulated sugar
- ½ cup (118 ml) vegetable oil
- 3 large eggs, at room temperature
- 1 tablespoon (14.8 ml) vanilla extract
- ½ cup(120g) sour cream, at room temperature
- 2 ½ cups (350 g) all-purpose flour sifted
- 3 teaspoons (11.2 g) baking powder
- 1 teaspoon (5 g) salt
- 1 ¼ cups (296 ml) milk (any type), at room temperature
For the Frosting and Decorations
- 2 cup (454 g) unsalted butter, cold
- 7–8 cups (911-1041g) powdered sugar
- 1 tablespoon(15ml) Pure vanilla extract
- 2 tablespoons (30 ml) heavy whipping cream or milk
- Super Red gel colors (see notes)
- Large candy eyes
- 6–10 Oreo cookies (filling removed)
- 24 Orange M&Ms
Instructions
For the Cupcakes
- Preheat the oven to 350°F. Line a cupcake pan with cupcake liners.
- In a large mixing bowl, combine the sugar, vegetable oil, eggs, and vanilla extract. Beat on medium speed until the eggs and oil are well incorporated and the batter is lighter in color, about 2 minutes. Scrape down the bowl as needed. Next mix in the sour cream and beat until well combined.
- In a separate bowl combine the remaining dry ingredients: flour, baking powder and salt. Add half the dry ingredients, and half of the milk and mix just until the flour starts to incorporate. Add the remaining ingredients and mix until well combined. Use a spatula to scrape down the sides of the bowl and stir the batter from the bottom to the top to ensure it’s well mixed.
- Using a large cookie scoop, divide the batter evenly, filling each liner 2/3 full.
- Bake at 350°F for 14-16 minutes. Test the cupcakes for doneness by inserting a toothpick into the center of the cupcake. If the toothpick comes out clean, the cupcakes are done. Cool Completely.
For the Frosting
- Cut butter into pieces. Using the paddle attachment, whip the butter for 5-7 minutes, scraping down the bowl occasionally. Beat until the butter looks light in color.
- Alternate adding 2 cups of powdered sugar at a time with the liquid ingredients: vanilla extract & heavy cream. Ensure the powdered sugar is well combined, then whip for 1-2 minutes before adding more powdered sugar.
- Once all the powdered sugar has been added, increase speed to medium-high and beat for another 3 minutes or so to whip additional air into the frosting. Finally, dye the frosting red using red gel colors (see notes). Reduce the mixer to the lowest speed and beat for 1-2 minutes to eliminate air bubbles. Use a spatula to stir to remove any remaining air bubbles.
To Decorate
- Prepare the Oreos. Separate the cookies and remove the filling. Cut each cookie in half using a sharp serrated knife to create a half circle for the mouth.
- Fill a large piping bag ¾ full, cut off the tip about 1/2-inch up, and roughly cover the top half of the cupcake with frosting (this gives some height to the frosting). Using a knife, gently pull one edge of the frosting towards the bottom, unfrosted portion of the cupcake so the Oreo has something to stick to. Place an Oreo cookie on the bottom 1/3 of the cupcake.
- Prepare a small piping bag with a coupler and grass tip (#233). Then prepare a couple of separate bags with just the colored frosting, and place them inside the bag with the piping tip. Using a double piping bag allows you to change out the bag easily without removing a piping tip.
- Next, work your way around the dome of frosting, pulling the frosting in either an upward or downward position. Long pulls will result in longer hair, whereas short pulls will result in short hair.
- Once the dome of frosting is covered, pipe a small edge around the bottom half of the cupcake/Oreo. Place 2 large candy eyes on top and an orange M&M for the nose.

Notes
Frosting Color
- For this frosting, I used Super Red. To achieve a deep red color, you’ll need about 1 to 1 ½ teaspoons of gel. As is, the red is pretty bright. If you have crimson, you can try using a mix of crimson and red to get a darker red or the simplest trick is to add a touch of black to this to deepen the color and get closer to the cupcake liners used in this recipe. To add black, use a toothpick and dip it in the bottle of gel, adding just a smidge of it to the red. Keep adding as needed, a tiny amount at a time. Remember, you can always add, but you can’t take away!
- The red color will darken as it sits. If possible, I recommend making the frosting the night before you plan to use it. You’ll notice how much darker it gets. You may need to re-whip the frosting with a mixer before using it.
- Concentrated gel colors will give you the richest colors without thinning out the frosting. My preferred brand is Americolor or Chef Master.
- These are grease-free cupcake liners from Shop Sweet Treats. I love their liners because the color holds up when baking.
Storage:
- As prepared: Store the frosted cupcakes airtight at room temperature for up to 3 days. You can keep them in the fridge if your kitchen is particularly warm. Serve the cupcakes at room temperature.
- Freezing: Freeze the cooled, unfrosted cupcakes airtight and freeze them for up to 2 months. Defrost at room temperature before frosting and decorating.
- Leftover frosting: Store the prepared buttercream frosting at room temperature for up to 24 hours, or airtight in the fridge for up to 1 week. You can also freeze it for up to 2 months. Bring the frosting to room temperature before using. You’ll need to re-whip the frosting with a mixer before piping.
Nutrition
- Serving Size: 1 Cupcake
- Calories: 453
- Sugar: 51.8 g
- Sodium: 119.2 mg
- Fat: 21.7 g
- Carbohydrates: 63.3 g
- Fiber: 0.4 g
- Protein: 3.1 g
- Cholesterol: 67.3 mg